Sunday, October 23, 2011

Recovering an old vanity bench seat with a burlap coffee sack!

OK, does everyone remember this little vanity bench that I got from my grandparents' garage the other day?  It has a cool, chipped red (and under that, white) paint job and the seat cover was basically rotting off.  Here it was as I found it:

Well, I decided that the paint looked cool the way it was, so I just wiped it down really good to clean it.  I may go back later and rub some mineral oil on the wood to give it some moisture, but I haven't done it yet.  I started the seat covering by ripping off the THREE layers of old covers, which fell right off because they had rotted from sitting in a garage for decades.  I then pulled out the nails with pliers to reuse.  I saw the the cotton felt padding had a little moisture damage, but I was able to peel off the damaged layer and reuse most of the cotton. 
Then I covered the cotton and wood seat with my awesome coffee sack.  I chose the part with the coffee cherries because it looked cool and matched the red legs on the bench.


VOILA!  I screwed the top back on using the same screws and it was finished.  Because I didn't have to paint, this took me 30 minutes.  It was SO EASY.  And it came out looking so cute!  (Note: A few weeks later I realized the chippy painted legs probably needed some protection so I added a light coat of polyurethane.)

Thursday, October 20, 2011

My Day as an American Picker

I cannot even explain to you all how sore I am right now.  My back hurts somethin' fierce, and I feel like I could sleep for a week.  This afternoon I went through my grandparents' outdoor garage, indoor garage, and attic looking for "rusty gold," "diamonds in the rough," anything that I could salvage and make cool.  I climbed through heaps of straight up junk, dug out items which I thought were savers, only to find that they were beyond repair (antique dining table rotted to pieces...*sniff*.)  But I also dug out some items that really WERE savers, and scored an antique rocking chair from inside their house...because I'm their grandkid and they love me. ;)  Here's what I scored:
This is my grandma's old vanity bench.  I remember seeing this thing around as I was growing up, but of course it meant nothing to me then.  But now I just HAD to have it...weathering away out in the garage, it was ready to get a makeover from me.  It has this really cool chippy red paint, which I am going to clean up really good and keep the way it is, but the seat fabric was rotten away...actually there are three layers of different covers visible!  It just needs to be reupholstered with a new piece of fabric.  I was thinking something in a blue and white toile would look cool with the red legs.  Here's the top as it is:
I also found the silver platter next to it.  I may give it to my mom.  Below you will see the AWESOME Scotch whiskey wooden box that I found up in the attic.  My husband especially loves this find. ;)
Next are the three dining chairs.  These are all over 100 years old and came from my grandma's family home on Knotts Island, NC.  They are going to take MAJOR work if I am going to fix them up, especially the ones without seats.  But the frames are super sturdy, especially the little one in the middle is solid as rock.
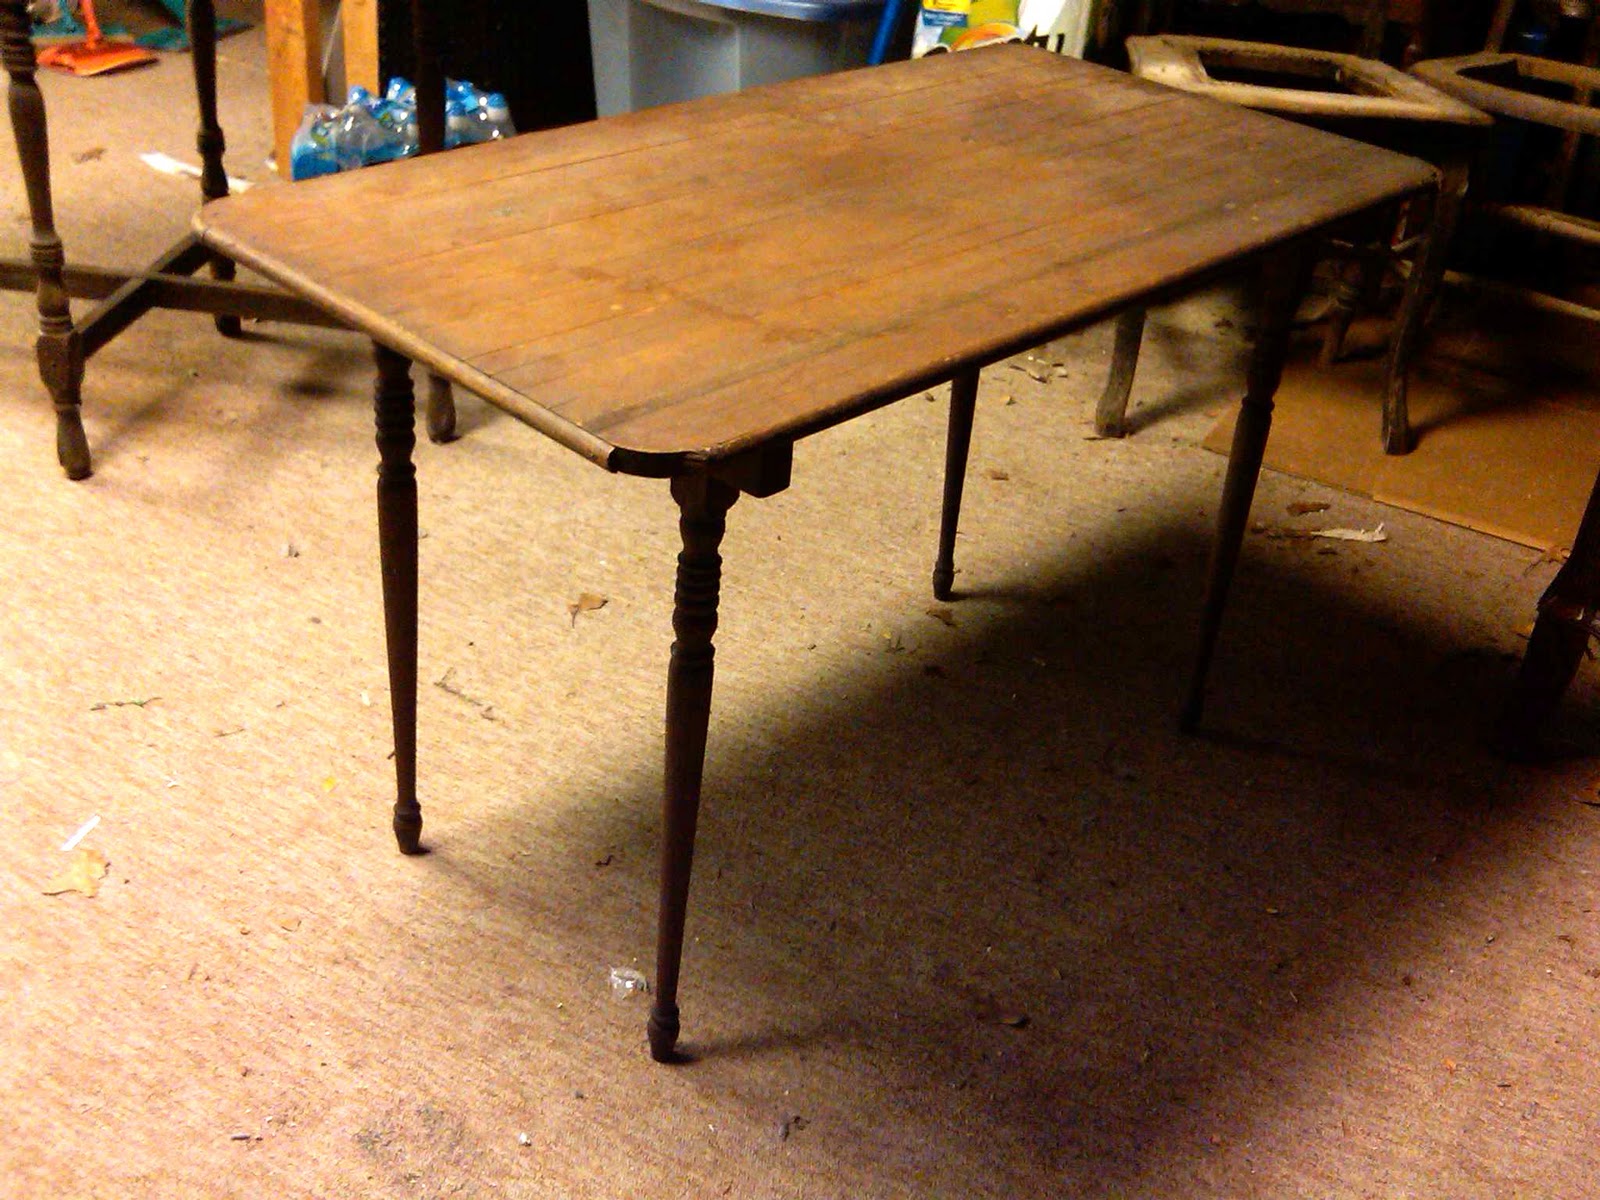
I also found this 100 year old folding wooden table in the attic...a very unique design, the table legs fold in and the pieces are in excellent shape.  Neither of my grandparents can remember where it came from.  ;)
I found this little wooden box.  It's old, but again, no one remembered how old or where it cam from.  It had a glass or crystal knob on the drawer and some cubby holes.  I thought it would be a fun little paint project.
And, last but absolutely not least....this antique rocker that I have been eyeing for a loooong time in my grandparents' living room.  It has goose heads on the arms and is SUPER comfortable.  I feel really lucky to have gotten this one!
My mom also found an antique 100 year old table, another which neither grandparent remembered they had!  Now I just have to start these projects one by one.  It is going to keep me busy for a while.  First off, I am just re-doing the vanity bench seat, and then maybe paint the little cubby hole box, and then on to the chairs....OH!  I almost forgot...our desk, which we also found in my grandparents' back bedroom a few weeks ago and re-finished, is finally done and ready to come home from my mom's garage!  I will post a blog about the process another day, but here's a finished picture-
Good night, everyone...time for me to pass out. ;)

Tuesday, October 18, 2011

Painting and Distressing a wooden chair

I got this captain's chair at Goodwill for $7.  It's somewhat old, not sure how old, but very sturdy and in excellent condition.  I felt like it needed a makeover, so I decided to paint and distress it.  Here's what it looked like before:
So, first I sanded it down.  Then I painted on Benjamin Moore "Ben" semi-gloss paint (because I like a little sheen, it looks older to me) in the color Ocean Air, which is a very light blue-green, so light it almost looks white.

It dried so fast, by the time I was done with one coat it was dry (I did two, but the second was very light.)  After 10 minutes the whole thing was dry!  Then I took sand paper and distressed the edges- basically everywhere you would see paint worn off on an actually old chair.


I decided to give it a little something special with my gold paint and stencil.

Let me tell you, friends, you better have a lot of sandpaper when you go to do a project like this.  Distressing was back-breaking work!  Maybe I painted it TOO well..haha.  Anyway, it ended up looking FABULOUS.  Totally worth the thumb blister.  As you can see below, it feels right at home as our computer/desk chair. :)

Monday, October 17, 2011

Thrift Store Score!!

I had the best luck today out in the thrifty world...found more items than I expected to, and for CHEAP!  My sweet 3 year old Abigail and I hit the Goodwill thrift store and two Salvation Army thrift stores in a matter of 2 hours!  This is what we came home with:

Carved wooden pedestal lamp (it's larger than it looks here, actually over 2 feet tall) for $5!  Got the shade at Target for $10.
Hand made stained glass panel.  My mom used to make these, so I know a real one when I see it.  Somebody made this, I don't know how it ended up at Goodwill!  Another $5.

Old wooden firewood bin, now being used for magazines, $3.

Hand blown glass vase.  It's hard to tell from this picture but it has really cool pink and yellow swirls, and you can see on the bottom where it was broken off from the blow-thingy (sorry, I am no expert in glass-blowing, I saw it once on a field trip to Williamsburg as a kid, but I don't remember the names of the tools.)  Another piece of what I would call art- 99 cents!

Three more plates for my collection- $2 each.

Old sturdy wooden chair to be used with the antique desk that my husband and I just refinished.  It is going to be a paint project, which I will of course chronicle in my trusty blog. ;) $7.

I saved the best for last!!!  I almost had a heart attack when I saw this vanity sitting on the floor at Salvation Army.  It stood out like a beautiful, antique sore thumb amongst all of the other 80's and 90's furniture.  I literally HAD to have it.  When they delivered it this afternoon, I seriously shed a tear because I could not believe it was mine.  I rubbed it down with a mineral oil/coffee ground mixture to restore color and shine to the finish, and that is really all it needed!  It is in excellent condition.  It is done in a Victorian style, but I have a feeling that it's 1920's or 30's Victorian revival.  It doesn't quite look old enough to be Victorian.  Either way it is now my dining room "sideboard."  $170, and WELL worth every penny!

It was a good day!  Now time to take a rest from buying and get to the paint projects I have lined up.  See you soon! ;)

Friday, October 14, 2011

Painting a Wooden Trunk

OK, I promised in an earlier post that I would write a post about the trunk which I painted and now have as our coffee table.  I have always wanted a trunk as my coffee table, and until I find a real one (preferably vintage steam trunk that is not being sold for thousands of dollars)...this was a little project that I took on for the fun of it.

I bought this trunk (really a chest made of wood and plywood hand painted by someone and with some trunk accessories added) at a thrift store for $25.  I thought it was kind of pretty but just not my style (it is also VERY sturdy and in excellent condition.)
I bought Glidden satin finish chocolate brown paint (which, if I could do it over I would not have chosen.  I think I would have liked semi-gloss espresso or black better.  But, you live and learn.)  And I got Martha Stewart vintage gold craft paint, some stencils, a medium sized paint brush, and a pack of 2 small stencil brushes.  This was all found very easily in the paint section of Home Depot.  It also cost a total of maybe $15.  I put 2 coats of brown paint on, let it dry to the touch, and then did the gold stenciling.  It was dry by a few hours later.  The inside lid was already white, so I left it and just put a little gold stencil inside.

After I finished, I thought the trunk looked fabulous.  But it looked too new, like it had just been painted.  (Probably because it just had.)  So I took sand paper and sanded the edges a little to give it some scuffs and make it look more worn in.  I like how the scuffs define the edges of the trunk better.
And here we go, now as our coffee table.  When we find a real vintage trunk, this one will probably become our kids' new toy box.  But until then, it's cute, and very functional.

Tuesday, October 11, 2011

Dissecting an antique chair for the first time

First of all, I just want to say that I am in no way an expert in furniture projects, nor am I trying to tell everyone the best way to do anything.  In fact, I am a complete amateur and I just like to share my own experiences and take you all along on the journey with me.  If you have a better or easier way to do something or any advice because you have more experience, then I would LOVE to hear it!  This blogging thing to me is all about sharing, and helping each other.  That being said, I would just like to share this experience with you- my first try at re-doing anything antique.  It all started with a trip to the Salvation Army thrift store (of course)...

This chair was $10 at the thrift store.  I could tell it was old just by looking at it- it had years of different owner's wood stains built up on the wood and I saw that it had nails in places you just don't see anymore.  When I popped the seat off I knew for sure.  It was by itself in a sea of 1980's junk, so I had to rescue it.
This is the seat cover that was on it.  Someone put this on it in the 80's or 90's and it was just hideously ugly so I had to change it.  Seriously, it felt like someone's old basement rec room carpet.
When I took the fabric off, which had been stapled on, I found this awesome old raw cotton felt padding.  It was unbleached, with bits of husk and leaves in it.  It looked extremely old to me, so I had to be really careful with it.  I saw the original nails still in the wood from the first seat fabric that was ever used.  I also noticed these hand-cut dovetails in the joints of the square seat that let me know immediately that this was an old seat. Learn about hand cut dovetail joints here.
I pried these nails out (with pliers.)  It was easier than I expected, considering that those things had been in that wood for a LONG time.  I could tell immediately that they were hand cut because each one was different and you could see the cut marks on them.  They look like really old upholsterers gimp pins, which are falling out of use due to the popular usage of *cringe* staples.
This is the cotton seat about to get recovered:
I found this fabric, also at the thrift store, for $3.  I think it was an old pillowcase.
I reused the nails when I nailed it on.
Et voila!!  Fin!!  I thought the dark stain, though it had many flaws in it, looked cool and kind of rustic the way it was, so I left it.  I believe it is referred to as "patina."  Ha ha.  Read a fun article about patina here.