Saturday, October 5, 2013

We have moved!!


Finally finally finally!! We are out of student housing and have moved into a real home. The house we are renting is from about 1965, not quite as old as I would like, but it has nice wood floors throughout- NO carpet!!! Yay! We have plenty of space for ourselves and our things. I am in the process of decorating, in these photos you will see that we are still missing some curtains in some rooms. But at the same time it still looks very "lived in." I am happy to have finally found an actual house to display my crazy collections, it will do nicely until the day when we can buy an actual historic house. ;)


Tuesday, April 2, 2013

My first chair reupholster!

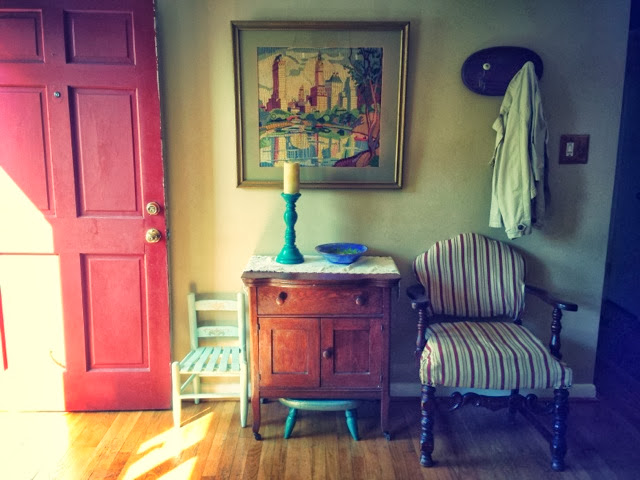
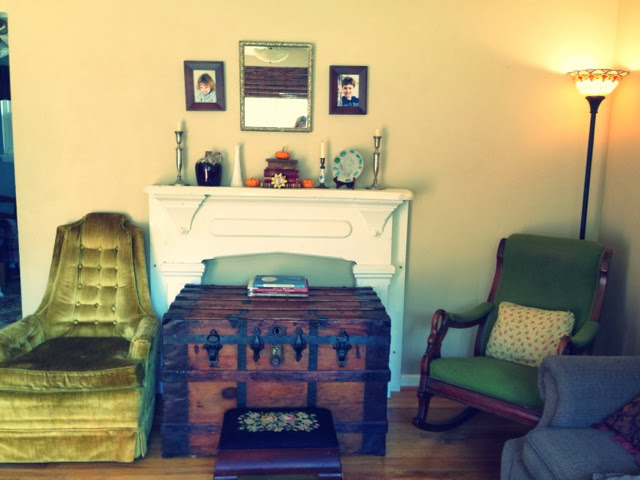
This was a tiring job, let me tell you. First of all, I spent the morning carting my two kids around with me on a journey to find the materials to fix this old chair. It is a chair that my grandparents bought years ago and wanted to fix up but never did, so it rotted in their back room for decades. I rescued it, mainly for the beautiful carved wood. The fabric on it was disgusting and I could tell springs had fallen out the bottom already. So, back to my tiring day- It turns out Home Depot does NOT carry anything for upholstering, the closest item they have is thumb tacks. Not quite. After there, we went to Goodwill on a hunt for cheaply priced fabric. I have such great luck at Goodwill! I find table cloths, sheets, blankets, and today...I found the perfect red and cream striped fabric, in the form of a curtain. It turned out to be the perfect amount to cover the seat and back, and for a mere $4.00. Then we made it to the fabric store where we found the webbing, tacks, and foam seat. I should have bought cotton batting for more fill, but I just couldn't afford it. This is a project that I needed to do for almost free, and I ended up spending $30 total. So after we got the supplies home, I tried to work off and on as my kids let me and then in the afternoon my husband took them outside and I was able to finish the seat. I had to throw out all of the old materials in the seat, they were just too far gone. I would even have thrown out the springs and put in a board under the foam seat but I didn't have access to wood. So I left the springs, minus the one that was missing. I also found a surprise- a child's charm bracelet was inside of the chair when I opened it up, stuck on the springs! Who knows how old it is or whose it was. A little history mystery left for me. :) So once the old material was out of the seat and the springs were cleaned up a little, I put the webbing across the bottom of the chair to support the springs. Then I added some ripped rags for stuffing around the foam seat, and I laid an old crib liner over it to smooth it out (those white absorbent things, moms know what they are) and began covering. I did the bottom in a separate fabric, just for fun. I found it pretty easy to use upholstery tacks, and avoided staples once again. I did run out of decorative tacks, though, so at some point maybe I'll get some more. The chair is now very comfortable and looks a LOT better than before, but it is far from perfect. It was my first attempt at reupholstering, and I am glad I got my feet wet. I think one day when we have some extra money I will get some cotton batting for fill in the seat, since you can see the square outline from the foam and that does annoy me. But at least for now, we can enjoy a previously hidden and unused chair. Some pictures:


Wednesday, March 13, 2013

Another Pressback Chair Makeover!

This might be my favorite chair that I own. It was my great grandmother's, and dates from the turn of the twentieth century. It has a beautiful Art Nouveau design pressed into it. My mom also has its sibling, which we have now painted a cottage grey. These chairs have a long history of makeovers. First they had the typical late Victorian dark stain and finish, which had bubbled up nicely by the time my mom decided they needed their first makeover in the 1960's. This saddens me, I sure would have loved to see their original finish...but moving on. My mom painted the chairs red and then an antiquing glaze over it. Then in the 1990's she sanded them both down with the intentions of repainting and never did. So when I got my chair it was sanded with leftover red paint in places. I decided to do a black over red with distressing, since the red was already there. Then I put a top coat of Minwax polycrylic over it. I think my chair looks amazing! Check it out.


Thursday, March 7, 2013

Hang a Quilt on the Wall!!

I decided to display my great grandmother's feed sack quilt from the 1920's or 30's on the wall of our dining room. It goes great with the rustic direction in which our decor has gone in that room. I've been influenced by early American decorating and primitive furnishings lately, and I love the history that it conjures up in my mind. I also painted three chairs black in that style. Oh! And I almost forgot, we decided to paint our table top red, instead of the stenciling. In the end the pattern fought with the quilt pattern, and the red is more rustic anyway. Always evolving!


Vintage Flower Print Table Cloth

I found this gorgeous rose print table cloth at a consignment shop a few weeks ago. It is in perfect condition, you can tell someone really took care of it. Since it is rectangular, my table is round, and the decor of the dining room is a little different from pink roses...I started to wonder what else I could do with it. Turns out our bedroom is nothing BUT flower prints, so I decided to use it in there. I wanted to make pillow shams, but then I wondered if one day I wouldn't want to use it as a table cloth. So, I decided to just lay it across the pillows. Perfect size! And it looks like shams once the throw pillows are on. Score! A $6 well spent.


Friday, February 22, 2013

Stenciled Table Top

I have been torn about our dining table for a long time. Originally I wanted an antique round country table, but I could never find one. I found many pedestal tables but I wanted one with legs. Finally, I found one at Target online, but nowhere near antique and it was a hideous factory blond color with a plasticky looking finish. Because it was the perfect style, I decided I would just buy it and "antique" it. So last year I ordered the table and painted it black, then distressed it and coated in polyurethane. I liked the way it looked, but it wasn't perfect. Mainly because the super light wood color under the black was too much contrast and didn't look like it had actually aged. That dang unstained blond wood!!!! The past year went by with the table under my vintage crochet table cloth. So, the other day it began gnawing on my mind again. I want an actual antique round dining table!! I still plan on looking for one, but in the mean time I also had another idea. Stencil the table top and make it a little more artful. I have already done a stool with this same stencil design so I knew exactly what to do. It is basically one square over and over and it ends up looking like granny squares, lace, or even quilting. It's really cool. I thought about white, but opted for my Martha Stewart craft paint in antique gold. It is very fast drying and looks amazing on top of black. This was actually a very easy job, with just a few things to remember. Wipe the stencil every time to get a neat print. Also to have a weathered appearance to the design, let some prints be bolder than others, and don't worry too much about small smudges. Do try to keep them lined up straight so that the design looks like someone worked hard on it at some point in time. Aged doesn't equal sloppy. Haha. Anyway, afterward, I ran some sand paper over some sections to make it look even more worn, and then I was done. I might add another top coat of poly if I get a chance, but it doesn't matter to me if it gets scratched because it is already distressed. This made me appreciate my table a little more, so now it is proudly on display instead of under a table cloth.


Sunday, December 16, 2012

Antique Screen Door Turned Headboard!

Hello, everyone!

I have been so busy that I haven't been able to take on any projects for a while. However, I did manage to squeeze this one in, and it's a really exciting one!

My mom found this old Victorian wooden screen door on an abandoned house in Portsmouth, VA about 20 years ago, and never did anything with it. Her dream had always been to use it as a headboard for their king size bed. After all this time had passed, and the door had been under a layer of dust in the attic, I finally decided to get it out and bring it back to life.

I wanted to use it as a headboard myself or a wall hanging of some kind. My mom didn't want it any more so she gave me the go ahead to do whatever I pleased with it. So I ripped out the screen, sanded any splinters off (the finish was pretty much gone anyway) and then I painted one layer of rustic looking pastel sky colored paint. Then I gave it a light distressing with sand paper. This was a really easy makeover, there wasn't a whole lot of surface to cover.

I tried hanging the door sideways like a headboard, but because of the handle (which I thought looked cool so I didn't want to remove) it wouldn't lay flat. I felt like I just couldn't keep it up on the wall securely enough to sleep well at night. I would not want to awaken to that thing falling on our heads! So I stood it up behind the bed and hung a votive candle holder shaped like a branch in the space, and I think it looks really cool the way it is! I love the spindles on the door, typical Victorian accents. Here are some photos-